


Post by RDTranny on Dec 11, 2012 23:39:42 GMT 1
I remembered I had a thread going on another forum about the camper and even though she's put away for the time being I though I'd resurrect the progress report.
So here it goes:
7/04/11
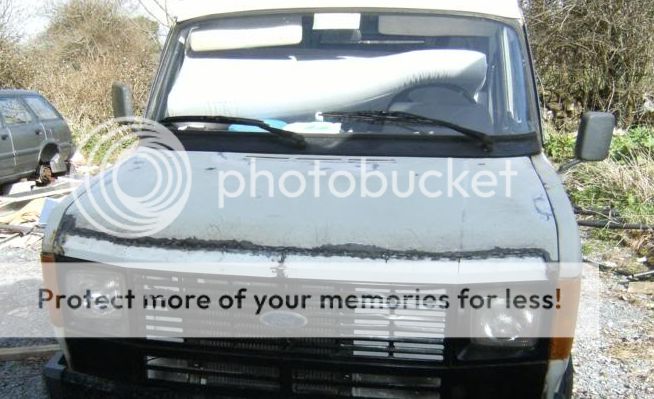
First job I though I'd tackle was the bonnet! It had been kept together with gaffer for far too long:
After a little brushing:

Then cutting:

Then welding:

Trying out for size: I didn't quite get it right but it's close enough I think....
Then filling:

and painting:

I used the rustoleum roller method but the first coat was drying a bit bubbly so I thinned the roller and smoothed it out and let it dry.
Not the most successful first coat.
I sanded it back and tried again with better results. (pics to follow) Much happier now!
Meanwhile outside at the van.........It appears I'm a dangerous man with an angle grinder!
Whats left of the RH step!

RH wheel arch:

LH wheel arch and corner:

LH step:

Inside the rear corners are really bad!


The annoying thing about the rear corners is that the floor is rusted about a half inch in but there's hard board lining just above it that may not take to being welded very well. It'll have to come out and therefore so must most of the interior! I've been thinking about a layout change so this may be the excuse I need. We'll see!
I've taken more pics but lost them somewhere so there'll be more rust grinding adventures soon!
14/04/11
Just a quick few pics of the bonnet and the finish of the rustoleum. It'll need to be flattened back but I think it looks good.....


Also got the right wing off to make it easier to fix up the inner panels.

21/04/11
Been busy at it again....got to love the good weather!
I removed the left wing and examined the area around the windscreen surround - low and behold it was really rotten where a repair had be made before.......
So I removed the screen and produced the grinder again and ended up with this!

The rot had eaten into the A pillar....
After a little welding thing were as good as (nearly) new!

Next came the really finicky bit of trying to repair the surround so finicky I forgot to photo any of it!:oops: But basically I tried to keep it as simple a shape as possible and add the details in with filler afterwards, (a little cheating, I know,:ph43r: but this has to be finished sometime this year! )
It's now almost smoothed over with filler just need a little more work to get it close to right......
Meanwhile the camper interior is totally removed. I thought I'd leave no stone unturned and luckily there's been no major surprises. The floor has been kept in reasonable condition under the timber.
I'll throw up some pics next time!
11/05/11
Unfortunately progress hasn't been as progressive as I'd liked. Been sick over the easter hols and with the kids off meant little done which was a pity as the weather was only gorgeous! Ah well...... at least I didn't get sunburn!
But I'm almost finished under the right wheel arch. Just have to plate the last bit in the bottom corner, repair the step and weld in a little reinforcement plate for the bonnet hinge!
Screen is back in and a bit of patching was done to the right side of the surround.

Some panels arrived that I 'd ordered and with that I got grinding again........excuse my french but **** theres a lot of rot!!!!! I may have to get another sheet of steel!
I am waiting for the wheel arches to arrive before a grind out whats left of the originals....

I thought to myself after seeing all the rust if anyone came around looking to by it for scrap I'd have handed it over there and then!!!!!!! (Shame on me!)

Anyway I slapped myself for thinking such impure thoughts and continued removing the rot!

By the end I had very little to scrap anyway!!!!! :lol:
It amazing what lurks behind the underseal! I had thought these bit were fine but with closer inspection the tiny rust bubble has revealed (yes you guessed) more rot!

I'll have to strip that shite off to see how far it gone! Hopefully what I see now is what I'll get.
14/11/11
The weather over the summer was not welder friendly so I managed to move her into the shed where she just about fits! There is not much room to move about but at least she'll be dry. It's kinda turning into a winter project but I have got the engine bay repainted and the front wings back on and sanded down. Also did all the seals, some gaskets, valve clearances and timing belt on the engine and she started up on the first turn after an oil and filter change. She ticks over nicely now!
And this is how she looked today ater a lick of paint:

I'll have to improve my technique, there are a few runs to sort out.
I only painted as far as behind the doors as the garage is tight for space. I had to do the front first then I'll reverse her out turn her around and back her in to do the rear. At least the front should be weather proof. I was hoping to do the gravigard stone chip around the bottom panels but it will have to wait till it can be done outside. There's just not enough space.
------------------
And there it ends for the moment. For the rest of that year I had to get the house in order so we could rent it out and then in Feb we moved over to Guernsey. So that's it till next time!
So here it goes:
7/04/11
First job I though I'd tackle was the bonnet! It had been kept together with gaffer for far too long:
After a little brushing:
Then cutting:
Then welding:
Trying out for size: I didn't quite get it right but it's close enough I think....
Then filling:
and painting:
I used the rustoleum roller method but the first coat was drying a bit bubbly so I thinned the roller and smoothed it out and let it dry.
Not the most successful first coat.
I sanded it back and tried again with better results. (pics to follow) Much happier now!

Meanwhile outside at the van.........It appears I'm a dangerous man with an angle grinder!
Whats left of the RH step!
RH wheel arch:
LH wheel arch and corner:
LH step:
Inside the rear corners are really bad!
The annoying thing about the rear corners is that the floor is rusted about a half inch in but there's hard board lining just above it that may not take to being welded very well. It'll have to come out and therefore so must most of the interior! I've been thinking about a layout change so this may be the excuse I need. We'll see!
I've taken more pics but lost them somewhere so there'll be more rust grinding adventures soon!
14/04/11
Just a quick few pics of the bonnet and the finish of the rustoleum. It'll need to be flattened back but I think it looks good.....
Also got the right wing off to make it easier to fix up the inner panels.
21/04/11
Been busy at it again....got to love the good weather!

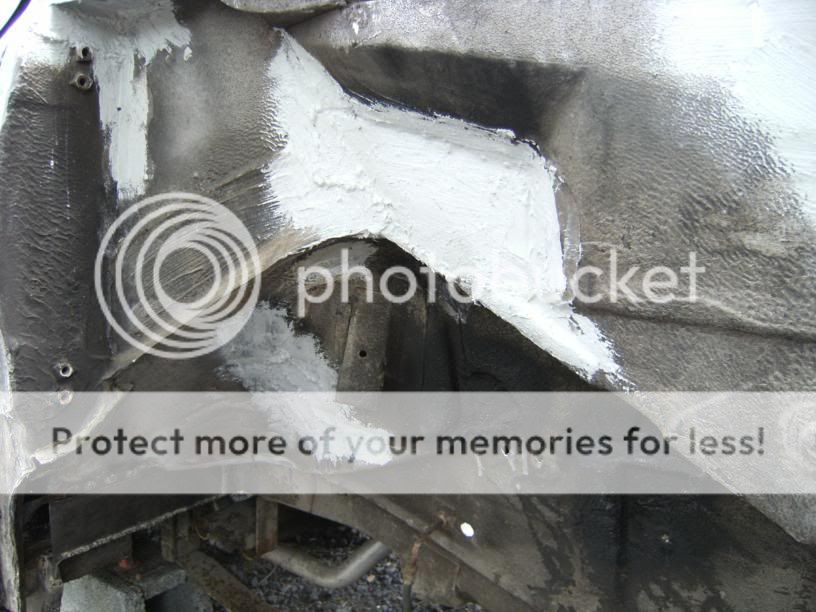
I removed the left wing and examined the area around the windscreen surround - low and behold it was really rotten where a repair had be made before.......
So I removed the screen and produced the grinder again and ended up with this!
The rot had eaten into the A pillar....
After a little welding thing were as good as (nearly) new!
Next came the really finicky bit of trying to repair the surround so finicky I forgot to photo any of it!:oops: But basically I tried to keep it as simple a shape as possible and add the details in with filler afterwards, (a little cheating, I know,:ph43r: but this has to be finished sometime this year!
)It's now almost smoothed over with filler just need a little more work to get it close to right......
Meanwhile the camper interior is totally removed. I thought I'd leave no stone unturned and luckily there's been no major surprises. The floor has been kept in reasonable condition under the timber.
I'll throw up some pics next time!
11/05/11
Unfortunately progress hasn't been as progressive as I'd liked. Been sick over the easter hols and with the kids off meant little done which was a pity as the weather was only gorgeous! Ah well...... at least I didn't get sunburn!
But I'm almost finished under the right wheel arch. Just have to plate the last bit in the bottom corner, repair the step and weld in a little reinforcement plate for the bonnet hinge!
Screen is back in and a bit of patching was done to the right side of the surround.
Some panels arrived that I 'd ordered and with that I got grinding again........excuse my french but **** theres a lot of rot!!!!! I may have to get another sheet of steel!
I am waiting for the wheel arches to arrive before a grind out whats left of the originals....
I thought to myself after seeing all the rust if anyone came around looking to by it for scrap I'd have handed it over there and then!!!!!!! (Shame on me!)
Anyway I slapped myself for thinking such impure thoughts and continued removing the rot!
By the end I had very little to scrap anyway!!!!! :lol:
It amazing what lurks behind the underseal! I had thought these bit were fine but with closer inspection the tiny rust bubble has revealed (yes you guessed) more rot!
I'll have to strip that shite off to see how far it gone! Hopefully what I see now is what I'll get.
14/11/11
The weather over the summer was not welder friendly so I managed to move her into the shed where she just about fits! There is not much room to move about but at least she'll be dry. It's kinda turning into a winter project but I have got the engine bay repainted and the front wings back on and sanded down. Also did all the seals, some gaskets, valve clearances and timing belt on the engine and she started up on the first turn after an oil and filter change. She ticks over nicely now!
And this is how she looked today ater a lick of paint:
I'll have to improve my technique, there are a few runs to sort out.
I only painted as far as behind the doors as the garage is tight for space. I had to do the front first then I'll reverse her out turn her around and back her in to do the rear. At least the front should be weather proof. I was hoping to do the gravigard stone chip around the bottom panels but it will have to wait till it can be done outside. There's just not enough space.
------------------
And there it ends for the moment. For the rest of that year I had to get the house in order so we could rent it out and then in Feb we moved over to Guernsey. So that's it till next time!


